Sunday, August 29, 2010

Day 19: Modern Day Sauces

The past two days we made what are considered classic sauces. Although the classic sauces are delicious, many people have begun experimenting with new flavors, and lighter sauces. Most classic sauces have a heavy base and need a long cooking time. I personally enjoy modern sauces more (except for classic tomato sauce which I will be loyal to forever), since they are a bit more exotic in flavor and lighter. A few highlights from the lesson:

Roasted Tomato Coulis-This is a modern day tomato sauce. Instead of cooking sauce in a pot you roast tomatoes, garlic, thyme, and olive oil for around 2 hours in the oven and then use a food mill to mash it up. I think this can be delicious pre-mash as an appetizer or post-mash as a sauce.

Tomatillo Salsa-SPICY SPICY. There are 2 jalapenos in this salsa but it tasted like one big jalapeno to me, and I like spicy. Chef recommended we wear gloves when working with the jalapenos to avoid getting burns on our hands. To make this easy sauce you blend roasted tomatillos, jalapenos, yellow onion, cilantro, cider vinegar, olive oil, sugar, and salt and pepper. It is really delicious as a dip or a spread to accompany any Mexican dish.

Mango Chutney-Favorite of the day. This is an Indian inspired dish that includes cooked mango with a sweet and spicy glaze. The highlighted flavors were the ginger, white wine vinegar and cloves. It reminded me of a Jewish holiday dish so I am going to make it again for Rosh Hashanna. Cousin Derek, you don't need to wait till Thanksgiving after all.

Corn and Red Pepper Relish- This is like a salsa with chopped pepper and corn. By the books a relish is a fruit or veggie combined with vinegar, sugar, and chili.  It is a really fresh tasting sauce that can either be eaten with chips or as a side dish.

In addition we learned how to make flavored oils, a citrus juice, and Jus de Veau Lie which is the modern day version of sauce Espangole.

Saturday, August 28, 2010

Lesson 18: Emulsion

Emulsion sauces are the successful combination of 2 or more ingredients that normally would not mix together, like oil and vinegar. In order to be successful you need to add the oil into the dish slowly, whisky quickly. You also need an emulsifying agent: mustard, egg yolks, nuts, garlic, and/or soy.

Now to be specific, we started by making Sauce Hollandaise. This calls for egg yolks, water, clarified butter, lemon juice, and salt and pepper. In order to cook the eggs, you whip them with some of the other ingredients in a bowl that sits on top of a heated pot. After that you whisk in the butter and lemon juice. With all emulsified sauces, you run the risk of the sauce 'breaking', not holding together with its fellow ingredients. This happened to my sauce originally, making it very ugly. Chef then showed me that by adding some of the emulsifier and water and then whisking it will bring it back to life:
Hollandaise prep

Hollandaise

Sauce Bearnaise: This is basically hollandaise plus shallots,  peppercorns, tarragon, tarragon vinegar and white wine. If you like hollandaise, this is like the bonus version.


Sauce Beurre Blanc: Winner of the day!! This sauce was so flavorful and delicious, for obvious reasons. It called for a full pound of butter, whisked into shallots, white wine, white wine vinegar, bay leaf, and peppercorn. 
Beurre Blanc Simmering
Whisking in butter


Mayonnaise: I am not a mayo girl, but after making it homemade I understand the hype, a little. Making mayo is actually pretty easy: Whisking in egg yolk, lemon juice, and dijon mustard. Then you slowly pour in canola oil and whisk quickly and add salt and pepper. The uncooked egg yolk made me nervous, but the acid in the recipe cooks it enough that the chance of getting sick is very slim. With this said, you can not store home made mayo for  a long period of time like store bought mayo, only a day or two.


The runner up for the best sauce of the day goes to the Vinaigrette. I am one to make my own salad dressing over using store bought. However, I never quite knew how to get the consistency of the delicious dressings you get at a restaurant, but now I do. We made this vinaigrette with shallots, dijon mustard, red wine vinegar, canola oil, and salt and pepper. After combining the shallots, mustard and vinegar you add the canola oil in a thin stream and whisk it through. This process combines all of the ingredients. I am now an addict and have made salad for the past 4 meals, thanks culinary school for keeping me healthy. 


Day 17: Saucy

Tuesday we focused on making other grand sauces and derivative sauces from the mother sauces. Today we worked in teams so it was a lot less hectic, especially since we made 7 sauces.

Demi Glace: This is brown veal stock and Sauce Espagnole reduced. You would think this would taste exactly like Sauce Espagnole but adding additional veal stock gave it a lot more flavor and thickness.


Mise en place for Classic Tomato Sauce
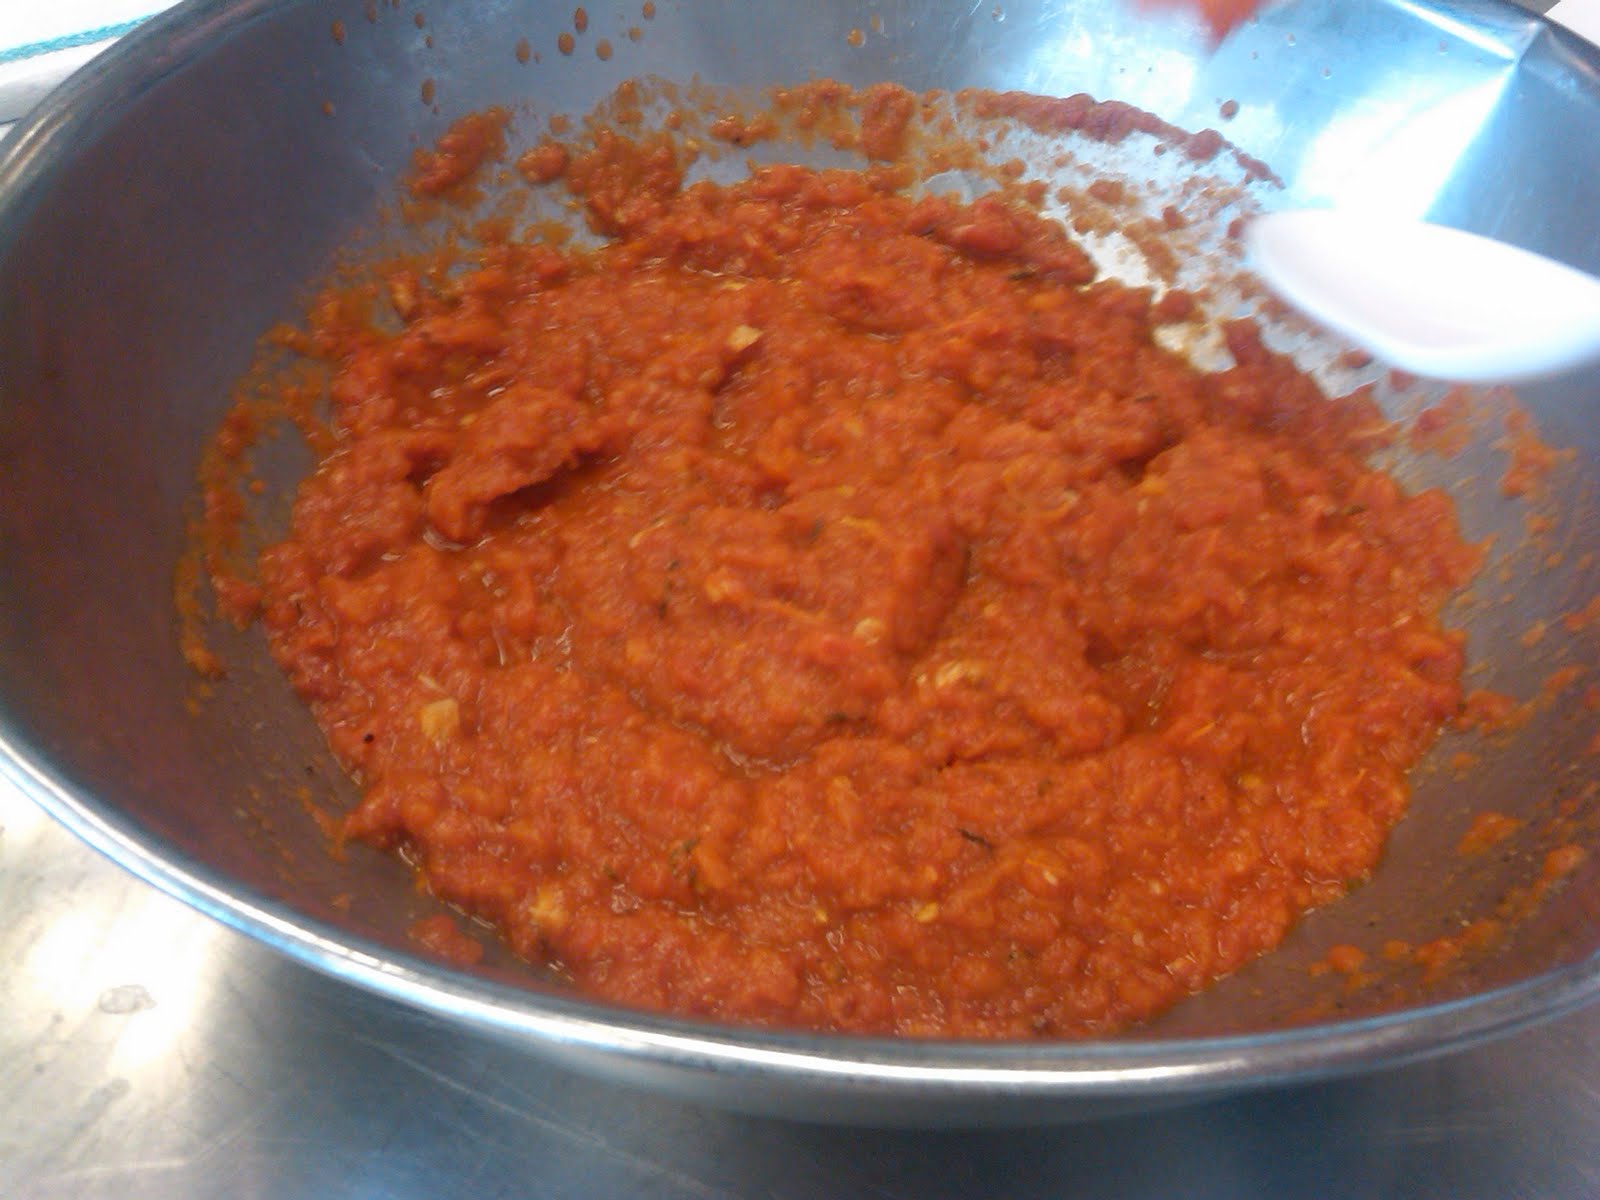
Classic Tomato Sauce: WOW I could live off of this sauce. This happened to be the longest cooking, most complicated of the sauces but the results were unreal. This classic tomato sauce uses pancetta and pork bones, the 2 secrets to getting exceptional flavor, vegetarians be aware. There are also a ton of veggies, herbs, and veal stock included in the recipe.  After cooking this sauce for 3 hours we used an immersion blender to grind up all of the veggies and pancetta. This device is a power tool that blends everything up right in the pot you are cooking in! I brought home the sauce and used it 3 times in the past two days- first to make quinoa, then pasta, and dip in bread.

Finished Classic Tomato Sauce 
Sauce Allemande- This uses mushrooms, Veloute from yesterday, egg yolks cream, and a bunch of other ingredients. This was not my favorite, but it was a very interesting recipe. When cooking with egg yolks,  you need to 'temper the liason'. While the egg yolks and cream are titled the liason, what tempering means is to pour some hot liquid into the egg yolk/cream combination prior to pouring it into the main pot of ingredients. This adjusts the temperature of the liason slowly, avoiding the eggs from scrambling.

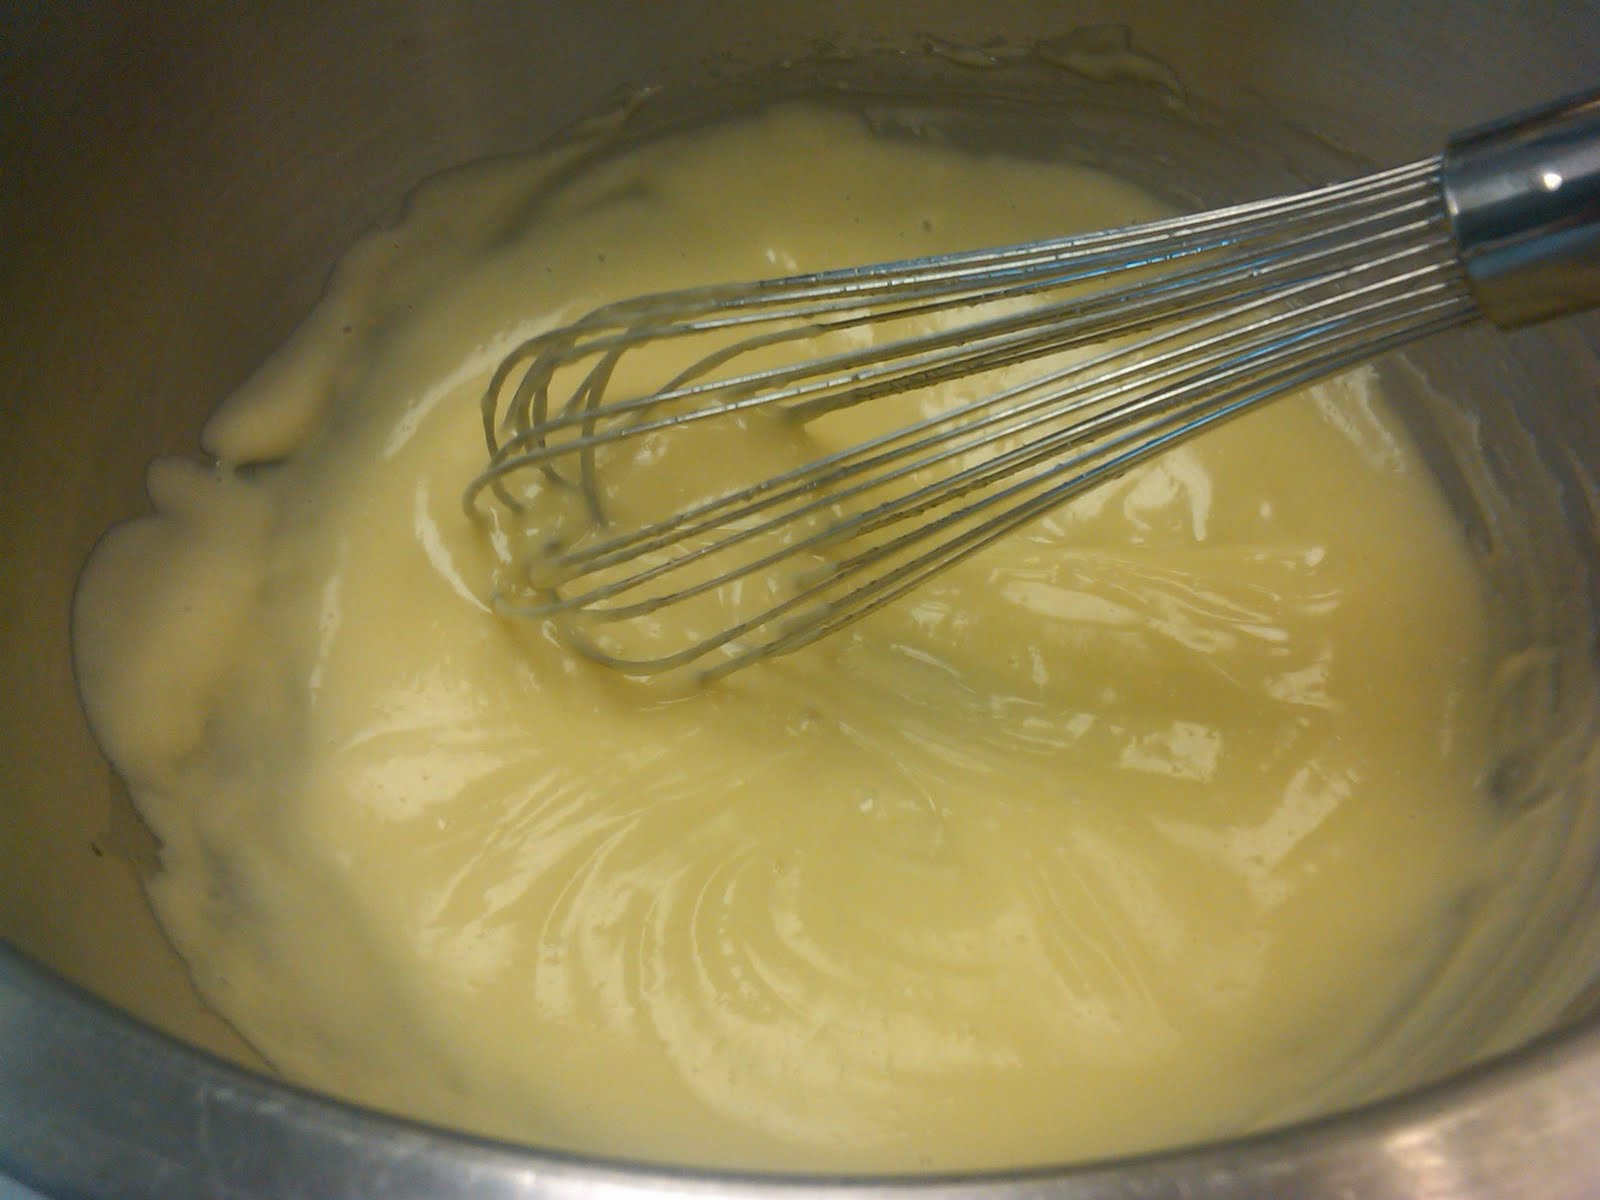
Sauce Supreme-This is made with Veloute, heavy cream, butter and salt and pepper.

Sauce Mornay-Another favorite. This is Bechamel sauce with Gruyere cheese and Parmigianao-Reggiano mixed in, of course its amazing. After heating the Bechamel you whisk in the cheeses, season it and it is all done! I had to force myself to leave this sauce at school otherwise I would have been licking the bowl.


Fortified Wine Derivatives From Demi-Glace-As it sounds, this is a sauce with a wine base. It is extremely aromatic.


Tomato Sauce Soubise- Soubise means 'a lot of onions', aka this dish had a pound of onions in it. In addition there was butter, Bechamel, and tomato puree. Once cooked we used the immersion blender to blend it up. At the end of the process it tasted similar to vodka sauce.  Another sauce that I had to resist drinking.


Immersion Blending the Tomato Subise


Finished Tomato Subise 


Wednesday, August 25, 2010

Day 16: Who's Your Mama

Monday we made what are called the 'mother sauces'. These grand sauces are the 5 classic sauces. They can be served as is or can be used as a base for other sauces. Using the techniques we learned on Friday we were told to make all 5 sauces. Although we were all excited to get into the groove of cooking, Monday was HECTIC. Between the rain, it being a Monday and it being the first day we were on our own to cook it was a bit overwhelming. Although this was the case we all successfully made each sauce.   We made the following:

Sauce Espagnole/Spaniard Sauce- This is a dark brown, rich sauce made with a brown veal stock base. It simmers for over 2 hours so it reduces and has a thicker consistency.

Sauce Veloute- The base of this is a chicken stock and blond roux (clarified butter and flour cooked together). Therefore it was a lot lighter in color and flavor. I found it rather bland but the simple base definitely allows for creative sauces to be made from it.

Sauce Bechamel-The base of this sauce is milk and white roux. It is also lighter in color and flavor. An ingredient called onion pique is added, giving it a bolder flavor than one would expect. Onion pique is an onion with a bay leaf attached to it by the use of 3-4 cloves which act like push pins. This gave it an aromatic quality.

Glace de Viande-This is simply brown veal stock reduced until it is half its size. This happens by simmering the stock and allowing the water to evaporate out of it, leaving it thicker and more potent. A sauce like this relies heavily on the preparation of the stock, which is probably why we spent a full week working on stocks.
The front put is Sauce Bechamel (check the onion), the back pot is Sauce Bechamel

Each sauce was stored for the next day. Following that we stayed 45 minutes late to clean at least 25 pots. Keep in mind we are only 5 people in our class. I am still baffled thinking about how classes with 15 students clean up at the end of the day...

Sunday, August 22, 2010

Day 15: Mise en Place

Mise en Place is the process of preparing the kitchen and ingredients prior to cooking. This can be as simple as setting up your knives but can also include cooking certain ingredients that will later be cooked within a larger dish. We will begin preparing soups and sauces Monday therefore we needed to learn basic mise en place so we can be prepared. We started  by learning how to make clarified butter. Clarified butter is butter after milk fat and water is removed. To do this you heat up cubes of butter until melted and then simmer until the water evaporates. The milk fat will rise to the top. You know if the water is evaporated by looking in the pot and seeing if you can see the bottom. If so, you are almost done! Next up you need to strain the milk fats by pouring the butter through cheese cloth. This is a fine piece of cooking cloth that will catch even the tiniest of things and keep your final product free of any unnecessary ingredients. Once it is strained you can use clarified butter for many recipes. Most commonly people use clarified butter to dip their lobster in.  It can also be added to sauces and soups. Since the milk fat is removed, clarified butter has a much longer shelf life and can be stored for future use.

Roasting peppers can also be prepared in advance. Place a pepper on top of a flame. Cook it until the entire pepper is black. Remove the pepper with tongs and place it in a paper bag or in a covered container to steam for 10 minutes. After it cools peel the charcoaled skin off using a paper towel. Now you have a roasted red pepper!

Tomato concasse was my favorite preparation of the day. This is the process of 'crushing' a tomato says the French.  To begin the process remove the core of the tomato. Slice a small X on the bottom side of the tomato (called the blossom) to help peel later. Now place the tomato in boiling water for 15-30 seconds. Remove and place in an ice bath until it cools. Now all we have to do is peel the tomato and slice it to the size you choose. Most people prefer to cut the seeds out before chopping. The final product is a soft tomato that can be thrown into salads or used as a base in a sauce. I accidentally found myself eating every other piece during this segment, I highly recommend giving it a try.

The final lesson of the day was making starch thickeners. There are three types of starch thickeners including Slurry, Beurne Manie, and Roux. Slurry is made by combining equal parts modified starch with a liquid. Beurne Manie is butter and flour combined. Roux is butter and flour cooked together to form a liquid combination. Roux can be cooked to 3 colors depending on what the dish calls for. These thickeners can be added to soups and sauces and are chosen based on the recipe. For example white Roux can be added to chicken stock to give it the standard thickness which is called nappe. A quick trick to determine if your soup is thick enough is to see if a sauce or soup consistency coats the back of a spoon. Now that I know all of these tricks I am excited to get cooking on Monday!

Day 14: Frenching

Today we had our second test to make sure we understood the different types of fish, shellfish, meat, and stocks. After that we frenched lamb! I know that sounds silly but it is a very fancy way to serve lamb. We were each given a rack. We peeled off the large layer of fat, and sliced cuts between each rib. See below.

Following that we had to "shave" the ribs. We took our smallest knife (paring knife) and scraped over the ribs until all of the excess skin and fat was removed.  8 ribs later we had a perfectly frenched rack of lamb. This looked easy but it took a lot of energy to scrape meat off of 8 bones! Once the scraping was complete it did indeed look fancy. The leg is supposed to be 'so' clean that a guest can eat the rack of lamb with his/her hands. I think my guests would have been all set.

Next up we had to de-bone an entire leg of lamb. WOW this was a huge set of bones that curved in all sorts of funky ways. Following the bone line throughout this 1-2 foot piece of meat eventually led me to the knee bone where I reached success. This process took a good 20 minutes. When I finally finished I announced that I had NO idea how I just did that, but I was extremely excited to see my meat perfectly detached from the monster bones. Below is a picture of the leg pre-fabrication. The blue ink on top is the USDA regulation stamp saying that the meat is acceptable for consumption in America. To maintain food safety the ink is made out of blueberry dye.

As we waited for our leg of lamb and rack of lamb to be cooked by the Chef we strained the veal stock that had been cooking overnight. I worked with a partner to strain this professional kitchen sized pot containing the large bones shown in the butcher picture yesterday. Once it was all strained, we put it through a chinois which is a smaller strainer to keep all bones and vegetables from the broth. We put the large pot of strained stock over an ice bucket to cool. I tasted the stock which was extremely tasty and will definitely compliment whatever dish it is added to. At this point we also tasted the lamb. Unfortunately I enjoy my meat very well done. I blame my father for this insult to all chefs, but it is a flavor that me and my father love. It does make it hard for me to enjoy rare meat, the type Chef usually serves, so I have been struggling a bit. I managed a small bite but it was not my favorite of the meat so far. Today was the last day of fabrication but we will be cooking all of these meats again in the upcoming lessons.

Wednesday, August 18, 2010

Day 13: Big Butt

Today we fabricated pork and rabbit. Rabbit was similar to chicken so I will focus on the pork. I was extremely shocked to see this huge piece of pork this morning. Thinking back to the little piggies I have in my mind from Babe I was overwhelmed with the size of this meat. Below includes multiple parts of the pork including the baby back and spare ribs.

Pork is an interesting meat. In my eyes it has the most variety. It is the host to pork loin, salami, bacon, prosciutto, all of where are extremely different in texture, color and flavor. To start our lesson we focused on the butt. We cut it off the hunk and 'trussed' it. This means pulling in all of the meat to one firm piece and tying it up with string. I may have mentioned this in another post but in case not, trussing is done to allow meat to cook evenly.


After trussing we broke down the rib area. We cut through each rib, separating the chops and the ribs. As we cleaned our meat Chef cooked us a set of pork loin and baby back ribs. Said best by Chili's-"I love my baby back baby back baby back ribs".


Prosciutto happens to be one of my favorite things to eat. There is something delicate but delicious about it. It also reminds me of my time studying in Florence, Italy where it was acceptable (and cost efficient) to eat it every day-so I did. I asked Chef if it was possible to make your own prosciutto. Although she answered yes, you need a specific climate to store it in. It is also risky since failure to prepare it properly could cause it to not cook and make you sick. I will hold off on this for now and stick with buying my prosciutto from the local Italian markets. In the mean time, Chef told us about one of her trips to Parma, Italy where she went to a prosciutto factory. She said she met a man whose job is to rub the ham with the perfect amount of salt and curing agents. There is also another man who sticks each piece with a special bone to see if it is ready. Who would have ever known these jobs existed? In Parma they hang their prosciutto in this warehouse but they leave the windows open to add the flavor of the wind from the mountains. I thought this unique touch was so interesting, and something I never would have even thought about previously. What I do know, the next time I go to Italy I will be sure to visit this factory.

Day 12: Butcher Carly

Monday we worked with veal. Veal is a pretty controversial meat since it is the baby calf. With controversy comes the enthusiasts who love the meat for its tenderness and high quality. Often I see veal on menus, but don't be surprised if you are at a restaurant that doesn't serve it. Reading about a chef and their philosophy could give you some insight on the type of food they cook and why they may prefer to avoid certain things. It is a bit ironic for a chef to cook beef but not veal in my eyes but to each their own.

Huge Hunk of Veal 

This piece is the entire edible sections-loin, tenderloin, ribs, etc. We started by cutting down the veal into its respective cuts. In order to do so you need to use a fillet knife and slice right across the bone, pulling the meat away from it. This is a tricky skill set that gets easier with practice. You slice section by section until the meat is disconnected from each bone. After that point you disconnect the fat by applying the same method. Just as I was getting pumped up to have the opportunity to master the break down of a whole veal, my hyperactive sense of smell began to kick in. Maybe it is because I have never cooked veal before, or maybe because it was just smelly, but I had a very difficult time embracing the odor coming off of the meat. Chef was intrigued by how I felt, telling me that most people do not feel this way about veal. I was told my good sense of smell was a helpful trait for culinary school, but it seems that for the few things I do not like it is going to get interesting ( well, nauseating).

Now we have all of the veal parts broken down and cooked for tasting. The smell may have been a bit funky but it was delicious!

With every piece of meat broken off comes a set of bones. To make best use of the food, we learned how to make veal stock. To get the veal stock going I had to play butcher, and use a massive knife to break apart the ribs. That means I had to actually slam this huge knife through a rack of veal ribs until they budged. This was actually a very effective way to wake us all up at 9AM. We roasted the bones, roasted vegetables, added tomato paste and water and dumped it all into a large stock pot to simmer for 8-12 hours. Tomorrow we will see how it turned out. Until then I leave you with a picture of my butchering skills below. Sorry for the nightmares in advance.

Monday, August 16, 2010

Day 11: Did you say steak?

Today we learned how to fabricate beef. Chef began by drawing a picture of a cow and showing us all the different parts with their respective cut of steak. We learned that there are many tender cuts that can be used for grilling and sauteing. There are also less tender pieces that can be used in braises or stews. Their toughness can withstand high heat for a longer amount of time to make things such as brisket-my mom and grandma's specialty. We worked more with the tender pieces today since we were not focusing on cooking skills. Below is a slab of Filet Mignon before fabrication.
Before

We each got 1/3 of this slab to fabricate. We had to remove the fat with our boning knife, and take off any 'silver skin', a layer on top that is tough. We then cut it down into edible portions. We did the same thing for 3 different cuts of beef. Their shape, texture, and fat content varied and it was evident why these different cuts sell for different prices. After fabricating the meat completely chef prepared the three different types of beef for us to try. The shell steak and the Filet Mignon were very different in texture, obviously the Filet Mignon was superior and delicious. After lobster day and today I am starting to understand why the tuition for school is so expensive. I guess its worth it to have a steak house style lunch on a Monday?

                                     
                                                                           After

Day 10: Quak

Friday we worked with chicken and duck. We each fabricated 2 full chickens and a duck. Fabricating means to break apart meat/fish/poultry. Depending on what you want the final product to look like fabrication can be removing the bones, skin or fat and breaking down a whole section into edible portions.

We learned how to clean a chicken and then slice it into these edible portions. After all the tears, dislocations, and cuts were made we had breast, legs, thighs and wings. I eat chicken frequently but breaking it down was a first for me. On the second chicken we learned how to tie it into a roast. We used rope to tie back some of the moving parts like the wings and legs. This helps the chicken cook more evenly. We did the same thing with the duck next.

At the end of the class chef cooked us a few pieces of chicken and duck so we could each try it. The chicken was tasty as always. I also really enjoyed the duck which was something I have never tried. It is a bit darker and fattier then chicken but I would definitely eat it again. This was a pleasant surprise since our lesson plan said we were not cooking (aka not eating) for the day. She prepared the meats in some simple salt, pepper, and oil so we could really taste the natural flavor, thanks chef.

Thursday, August 12, 2010

Day 9: The Lobster Is Alive

Today's lesson was: Shellfish Fabrication. As a summary up front we learned how to fabricate fish, squid, shrimp, muscles, clams and lobster. It was pretty cool learning the different techniques and I am now able to break into any shelled fish. After fabricating and cleaning everything we made a shellfish soup. We did so by combing the fish stock from yesterday, a shellfish stock we made today, veggies, wine, water, herbs, crushed tomatoes and all of the shellfish that we cleaned. When it was complete it was so delicious, flavorful and filled with a ton of expensive and fancy fish.


Meet Fred
Now to the fun part. 4 hours before the soup was ready, we were taught how to fabricate the lobster.  The chef began the demonstration on how to kill a lobster. Now for some reason in my mind I was thinking 'of course we will not be individually fabricating a lobster'. As that thought came to my mind chef told us all to go grab a lobster. A live, fresh, moving lobster.  I walked over to the fridge and grabbed a lobster, who I will refer to as Fred. Fred rests on my pan with his claws rubber banned together. Chef instructed us to kill our lobster, since cutting his head off is less torturous than sticking Fred in boiling water, OH. Meanwhile Fred is looking at me in the face and flailing his skinny legs around and I am supposed to kill him. I finally build up the courage and do as I am told. I will spare you all of the details but first thing the head comes off. I am freaking out but happy the worst is over. Fake out, the tail and the legs are still flailing around. They continue to release adrenaline for a few minutes after their death causing them to move around. This makes it a bit tricky to remove his tail since it is still moving.   I flinched as the tail flapped at me while I was trying to remove it.  Finally I have a fabricated lobster who from the naked eye looks alive. I am certain this will be the most traumatizing experience of culinary school but knowing that I could tackle this task was pretty rewarding.


Meet Fred's Friends

Wednesday, August 11, 2010

Day 8: Fishy Fish

I finally have a camera phone so I will add as many pictures as I can!

Today was the start of lesson 2: Fish, Poultry, and Meat Fabrication. To begin we learned about the fat content in different types of fish. Most fish are very low in fat but there is a range from 2% fat all the way up to 12% fat content depending on the fish you eat. For example Salmon has a higher level of fat, which is usually paired with a stronger taste and smell.

We were given a flat belly fish (eyes are on top and they swim with their stomach to the ground) to fillet. We used a fillet knife which is a very flexible thin knife. We began by chopping off the head (it is 8:15AM to give you some context) and cleaning out what we so eloquently call the guts. Then we filleted the fish removing the meat from the skin and bones. I was having a tough time getting close to the bones so my fillets were a little jagged. Next up we filleted a round belly fish-see below. This was a lot easier to cut but had a lot more guts, good thing it was 9AM at this point.

bye bye fishy 


Once all 3 of our fish were fabricated we learned how to make fish stock. Stocks are made by cooking fish or meat bones with vegetables and spices. In this case we made a Fumet which means their was wine added as well. Stocks are used to add flavor and moisture when cooking. We can add stock as a base to cook other food instead of plain water. This will give whatever the item is more flavor. We completed the stock, strained the liquid, and put the soup container over an ice bath to bring it to a safe temperature. Tomorrow we will be using the stock to prepare something with shellfish. To end my day I am washing my uniform that smells a bit too fishy. 

Day 7: Green Eggs and Pam

On Tuesday we started the lesson by learning about the Brigade system. This is a traditional system that is followed in most kitchens where specific roles and responsibilities are defined by title. The chef, which in french means chief, is the head of the kitchen. Below him is a ladder of different roles and rankings. Some positions are managerial, such as the chef and sous chef, while other are task oriented such as the line cooks. There are separate cooks who have the role of making soup, grilling, making cold appetizers, butchering and numerous other positions. When you order a grilled chicken with a balsamic glaze and couscous it is possible that at least 3 or 4 people all helped prepare this meal. Chef told us about the roles we should expect as an entry level cook. Although their is a 'dishwasher' in the ladder of positions available she recommended we do not apply for this position, too bad.

After the history side of the class, we learned about the different fats used for cooking. To really understand the differences in flavor and color we cooked scrambled eggs in 3 different types of fat. We cooked 3 eggs in olive oil, canola oil, butter, and clarified butter. As a big Pam advocate when cooking eggs I was shocked to see how much fat chefs use in egg preparation. Not so shocking was how good these eggs tasted. After cooking each set of eggs we lined them up next to each other to see the different characteristics each batch had. Buttery eggs browned more, and eggs with olive oil took on a green hue. Although we were cooking the most basic thing it was still a really interesting lesson, and a class full to the brinks with eggs.

Monday, August 9, 2010

Day 6: Chiffonade

Normally Monday mornings aren't my finest part of the week. However, knowing that I was off to school where I would inevitably be cooking...delicious food...I somehow made it out of bed sans snooze button. I arrived to learn that we were working on culinary math. At first I thought I was going to fall right back to sleep, but it ended up being really interesting. We learned that the chef is in charge of ordering the food for the kitchen. In doing so he needs to take into account pricing, portioning, and waste. Although it seemed like basic math could figure out how to plan menu pricing, there are many hidden steps involved. Ever read a recipe that calls for 1 pound of bananas? Is that 1 pound with the peal or without the peal? Exactly-therefore the chef needs to take into account weight and size of all of the ingredients and how much of those ingredients can actually be used. The chef also can plan a menu to take advantage of the waste. For example, if a recipe calls for small diced potatoes there will be left over potatoes that could not be cut into a uniform small dice. Most likely one of your fellow diners is currently eating steak accompanied by mashed potatoes. These skills are important to learn for students who want to one day run a kitchen, and also for everyone to understand how to make best use of every ingredient.

Following math we worked with lettuce greens, cooked greens and cabbage. We chopped up numerous types of lettuce: Boston, romaine, arugula. To accompany the lettuce chef taught us about the variety in oils and vinegars. Although oil and vinegar is the most basic salad dressing option, there are so many different oil and vinegar combinations you can use. We stuck with the basics and lightly dressed the greens with 1 part balsamic vinegar, 3 parts extra virgin olive oil, salt and pepper to taste. I want to try champagne vinegar next time I make a dressing. Something about the word champagne makes it sound like it will taste special.

Next up we learned how to chiffonade cabbage. To start we had to chop into a huge red cabbage. This cabbage was a beast and was not willing to budge. I kindly offered the duty to my partner Juan who most likely had a better shot at cracking it. After a quick game of tug of war he finally cut the head open. We split it up and began to chiffonade the leaves. This is done by rolling cabbage into a round tube and slicing it into thin ribbons. Chef taught us how to wilt the sliced cabbage in salt, a very cool way to soften up tough cabbage.


Final duty of the day was to prepare cooked greens. I was in charge of collard greens and escarole. I washed, ripped, blanched and shocked these greens to help prepare them for sauteing. The escarole and collard greens were on the bitter side. At first taste I was not interested in eating them. However, after the blanch and shock preparation we sauteed them in oil, salt, and shallots. With a little bit of added flavor these cooked greens were delicious. Each group was responsible for providing two types of mixed greens. We went around the table and tried all of them. My favorite were mustard greens which were less bitter than the rest. Overall we learned a lot about the variety of greens that are available for chefs to use, now I just need to study which is which.

Friday, August 6, 2010

Day 5: Mash It Up

Today was our first test. It was on herb identification and food sanitation.  It is safe to say I am borderline OCD.  After learning many food sanitation rules I realized that all of my cleanliness quirks are good habits! I can guarantee both my mother and roommates are rolling their eyes at this comment, but like we learned in elementary school-safety first! Some things I learned that I did not know: when defrosting food from the freezer, it needs to be thawed in the refrigerator, under running cold water, or in the microwave and then cooked right away. Thawing food on the counter top allows pathogens to form which are dangerous and can easily ruin a night out to put it nicely.  Some of the things I learned were pretty gross but it seems that there are a list of rules set in place to help protect us all, phew.

Next up we learned how to blanch root and green veggies. We blanched haricot verts (which are pronounced a LOT differently than I previously thought), broccoli, and potatoes. After bringing the veggies to a pretty green color we stored them to use during Monday's class. We did get to use the potatoes to jump start our cooking! We began by using the stoves which have a much larger flame than I have ever worked with, they are pretty cool. We were provided with a rice press which mashes potatoes. The best way to describe it was a chef's way of playing with Play Doh. We pressed the potatoes, added butter, cream, milk, salt, and had a finale product. Although I am one for indulging and willing to take a caloric plunge once in a while, I can't say I will be ordering mashed potatoes any time soon. On the other hand they are so easy and fun to make!

While preparing our food the class next door brought over braised short rib served over polenta. Another class brought us Asian noodle salad. Both of these dishes were so delicious and left me really excited to work on both of these recipes.

Thursday, August 5, 2010

Day 4: The Real Intro to a Chef's Knife

Day 4 and we are chopping away! The Chef instructor gave us a set of vegetables to chop and dice up, helping us practice our knife skills from the get go. Overly eager about my new onion cutting skills, I dug a little too hard into the onion and ended up cutting myself. While this did not hurt right away, as soon as the chef instructed me to sit down and apply pressure, the throbbing kicked in. Two chef instructors examined my cut and decided it was not deep enough for stitches, but it was indeed deep and ugly. It was bound to happen eventually, so I am glad I got the true introduction to knife skills over with quickly.

I was once told that there is no crying in the kitchen so I tried to keep my cool (only 1 or 2 rollers once I looked down and got a good glimpse of what the knife did to me). I was bandaged up, cleaned my board and knife, and got back to work. Although I initially powered through I decided to take a quick break. I went to the ladies room where I had a good cry. After all, no one said there is no crying in the bathroom. I felt better so I returned to my station and cubed up the potatoes! Somehow this helped me cut better cubes! We then learned how to dice garlic. My obvious question to the chef was: "why do people think they will smell like garlic after they eat it"? Her response was that many foods have this effect. Many times vegetarians can smell when someone ate meat! I found this very interesting, especially since I am so hypersensitive to smell.  She also told us that rubbing your hands on stainless steel can remove the smell of garlic from your hands, so happy to finally know the trick! At this point I was doing all that I could to keep from thinking about the pain in my hand, so chop chop I continued.

Following knife skills we had a cheese tasting lesson, something that can make any cut feel better. We learned how cheese is made, and the difference between cheese types such as fresh cheeses, washed-rind cheeses, and hard/grating cheese. We were offered a taste of each cheese to distinguish the different flavors and textures. Pecorino Romano and Manchego cheese were my two favorites. Most interesting to me was the fact that many cheeses use mold to age the cheese or flavor it. Although it is fine to eat this mold, this is still a concept I find entirely intriguing and even a little odd.

We finished up class with herb ID. Rosemary is one of my favorite herbs but today I realized that Chives will become a close contender in future cooking: it looks like grass and is oniony tasting. This is an herb I have always seen in foods, but have never personally cooked with. I am going to test out my knowledge of herbs tonight on some chicken that is waiting for me in the fridge.

Day 3: Slap Chop: Remix

Previously, my knife skills were limited to Vince's Slap Chop advice (I prefer the remix: http://www.youtube.com/watch?v=UWRyj5cHIQA).

On Wednesday, I learned the first step toward creating my own remix, better known as "Knife Skills". Our chef instructor taught us how to chop celery and carrots, medium dice potatoes (perfect cubes, or so they were supposed to be), dice parsley and cut an onion. Learning the proper way to cut an onion was the coolest part, since you make a hand full of slices, and voila, you have a completely chopped onion.

Following our knife skills lesson the advisor from career services gave us a presentation on all of the resources the career center offers. On top of helping us set up our internships, she mentioned volunteer opportunities and organizations we could join across the city. The first opportunity I am interested in is cooking in a kitchen that supplies nutritious food to individuals with HIV and AIDS. This is a really great way to give back to community while sharpening my skills. I also want to apply for the opportunity to cook in the James Beard Foundation assisting a guest chef. There are so many influential chefs that cook in this kitchen, it would be a culinary dream come true. I am so excited to have these options at my finger tips and can't wait to start taking advantage of them.

After the lecture I was so excited about my new knife skills, so I headed to the Green Market in Union Square to pick up some fresh new practice. I decided to make an Israeli salad, containing chopped cucumbers, onions, tomatoes, diced parsley, olive oil, red wine vinegar, lemon juice, and salt & pepper. It was a ton of fun seeing how much easier it was to prepare with my new skills.

Monday, August 2, 2010

Day 1: Hot Stuff Coming Through

Today was my first day of culinary school at the Institute of Culinary Education.  Immediately I met a handful of my classmates. There are only 7 of us in my class which will give us a lot of one on one attention.  Our class is a mix of college graduates, high schools graduates, and one woman who is starting a new career.

We received our knives which are top of the line. I am so excited to get chopping and build the knife skill set. Additionally we got a large set of books that will cover everything from recipes, to being a successful chef in a restaurant. Although I rarely (never) read the readings in college, I am actually excited to start reading these books--I guess this is a sign that I am focusing on the right career! 


While the attire is the least important thing about culinary school, it is quite far the most comical (see below). I didn't exactly feel like a beauty queen wearing checkered pants, a white chef coat, a 'bonnet' looking cap, and clogs, but I will admit, it felt pretty cool!


The highlight of the day was when a class that is further along brought us a welcoming gift of lemon tarts. They looked like they were fresh from a bakery, and tasted even better! Although today was just orientation and a run through of what to expect, we will be making things like this soon enough! Until then, I can only hope this class continues to bring over their dishes to sample!

I walked in today extremely nervous, but after hearing about all of the amazing opportunities the school has to offer, smelling all of the food we will be making, and chatting with really great classmates, I am so excited to begin my career in the culinary arts!